Git for Beginners: Basics and Essential Commands
Ever worked on a project with others, only to get lost in a sea of conflicting file versions? Or perhaps you’ve made a change, realized it broke everything, and wished you could magically rewind to a working state? If so, you're not alone, and you're exactly why Git exists!
In the world of software development and beyond, managing changes to code and other files is crucial. This is where Git steps in.
What is Git ?
At its core, Git is a distributed version control system (DVCS). Git is like a super-smart historical record keeper for your files. It tracks every change, who made it, and when, allowing you to seamlessly collaborate with others and revert to previous versions if needed.
Unlike older, centralized systems where a single server held the master copy, Git is "distributed." This means every developer has a complete copy of the project's history on their local machine. This offers incredible benefits, including:
Offline work: You can commit changes even without an internet connection.
Speed: Most operations are local and incredibly fast.
Resilience: If the central server goes down, everyone still has the full history.
Why Git is Used ?
Git has become the industry standard for a reason. Here's why it's so widely used:
Collaboration Made Easy: Multiple people can work on the same project simultaneously without overwriting each other's work. Git provides tools to merge changes smoothly and resolve conflicts when they arise.
Version History: Every single change is recorded, creating a detailed history. You can see who changed what, when, and why.
Undo Button for Your Code: Made a mistake? No problem! Git allows you to revert to any previous version of your project, saving you countless headaches.
Branching and Merging: This is where Git truly shines. You can create separate "branches" to work on new features or bug fixes without affecting the main codebase. Once your work is ready, you can easily merge it back in.
Tracking Changes: Git shows you exactly what lines of code were added, deleted, or modified between different versions.
Git basics and Core Terminologies
Before we dive into commands, let's understand some fundamental Git concepts:
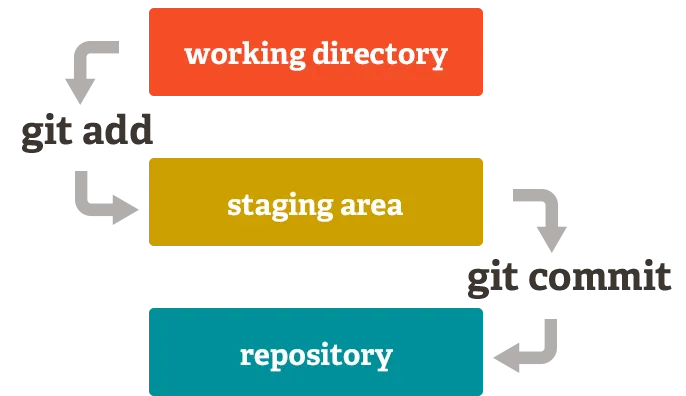
Repository (Repo): This is the heart of your Git project. It's a directory that contains all your project files, along with the complete history of every change ever made. Think of it as a special folder that Git watches over.
Commit: A commit is a snapshot of your repository at a specific point in time. When you "commit," you're essentially telling Git, "Hey, this is a stable version of my project; save it!" Each commit has a unique ID, a message describing the changes, and information about the author and timestamp.
Branch: Imagine your project's history as a timeline. A branch is essentially a separate line of development that diverges from the main timeline. This allows you to work on new features or experiments without impacting the stable version of your project. The default branch is usually called
mainormaster.HEAD: This is a pointer to the current commit you are on. When you switch branches, HEAD moves to point to the latest commit on that branch.
Working Directory: This is the actual directory on your computer where you're currently working on your files.
Staging Area (Index): This is an intermediate area where you prepare changes before committing them. You
addfiles to the staging area to tell Git which specific changes you want to include in your next commit.
Here's a visual representation of the Git workflow:
Common Git Commands: Your First Steps
Here are some essential Git commands to get you started:
1. git init - Initialize a New Repository
This command turns an ordinary directory into a Git repository.
cd my_project
git init
This creates a hidden .git directory, which is where Git stores all its tracking information.
2. git status - Check the Status of Your Repository
This is your go-to command for understanding what's happening in your repo. It tells you which files have been modified, which are staged, and which are untracked.
git status
3. git add <file> - Stage Changes
After you modify a file, you need to "add" it to the staging area. This tells Git that you want to include these specific changes in your next commit.
git add index.html         # Stages a single file
git add .                  # Stages all changes in the current directory
4. git commit -m "Your commit message" - Save Changes
Once your changes are staged, you can commit them. The -m flag allows you to add a concise and descriptive message explaining what you did in this commit. Good commit messages are crucial for understanding your project's history.
git commit -m "Add initial HTML structure for homepage"
5. git log - View Commit History
This command displays a chronological list of all commits in your repository. You'll see the commit ID, author, date, and commit message.
git log
You can press q to exit the log view.
A Basic Developer Workflow with Git
Let's walk through a simple scenario:
Create a new project folder and initialize Git:
 mkdir my-first-git-project
 cd my-first-git-project
 git init
Create your first file (e.g.,
index.html):<!DOCTYPE html> <html lang="en"> <head> <meta charset="UTF-8"> <meta name="viewport" content="width=device-width, initial-scale=1.0"> <title>My First Git Page</title> </head> <body> <h1>Welcome to My Project!</h1> </body> </html>Check the status:
 git status
 # Output will show 'index.html' as untracked
Stage the file:
git add index.htmlCheck the status again:
 git status
 # Output will show 'index.html' as new file to be committed
Commit your first changes:
git commit -m "Initial commit: Added basic HTML structure"View your commit history:
git logYou should see your first commit listed!
Make another change (e.g., add a CSS file
styles.css):/* styles.css */ body { font-family: Arial, sans-serif; background-color: #f4f4f4; color: #333; }Stage and commit the new file:
 git add styles.css
 git commit -m "Add basic styling to the page"
View the updated history:
git logNow you'll see two commits!
This basic workflow of modifying files, staging them, and committing them forms the foundation of using Git.
Local Repository Structure Overview
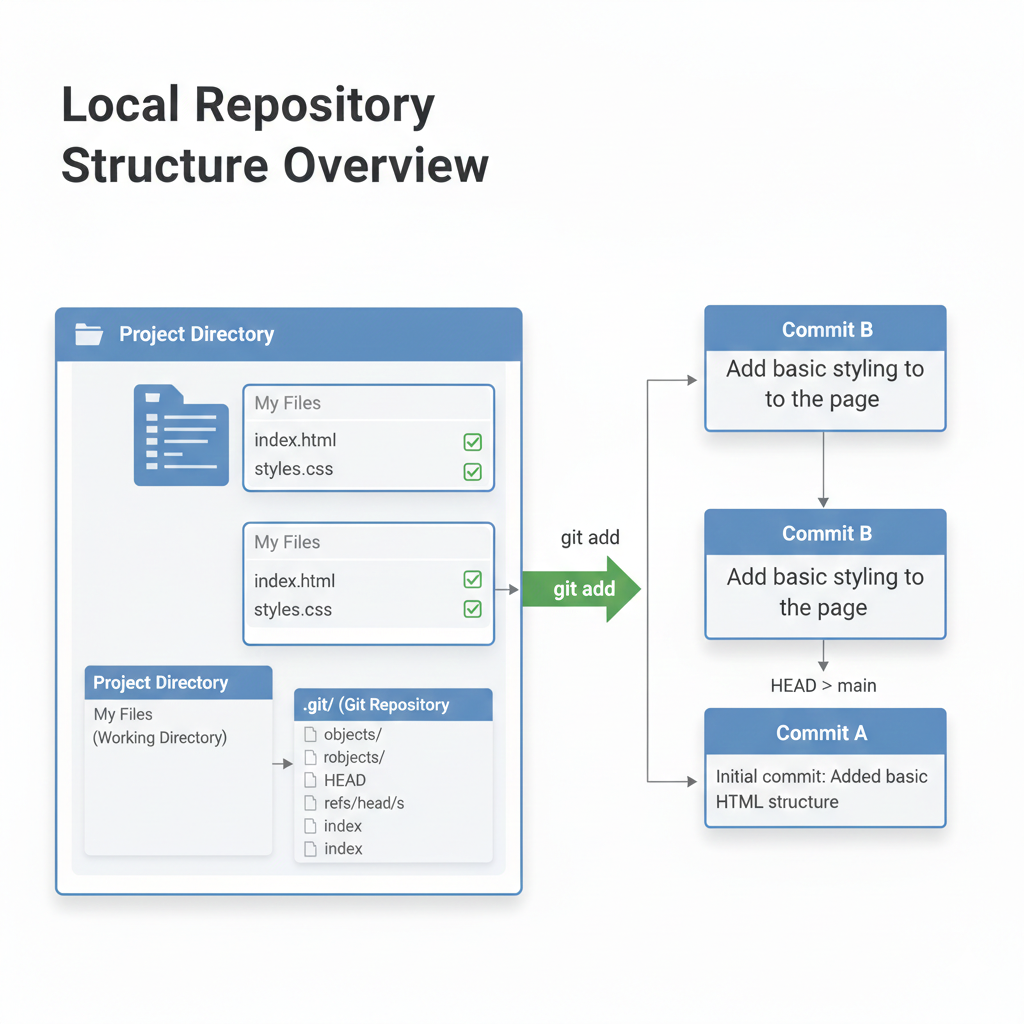
When you run git init, Git creates a special .git directory inside your project folder. This directory is where all the magic happens! It contains all the objects, references, and configurations that Git needs to track your project's history. You typically don't interact with it directly, but it's good to know it's there.
Here's a simplified view of how the local repository and its history might look:
Commit History Flow
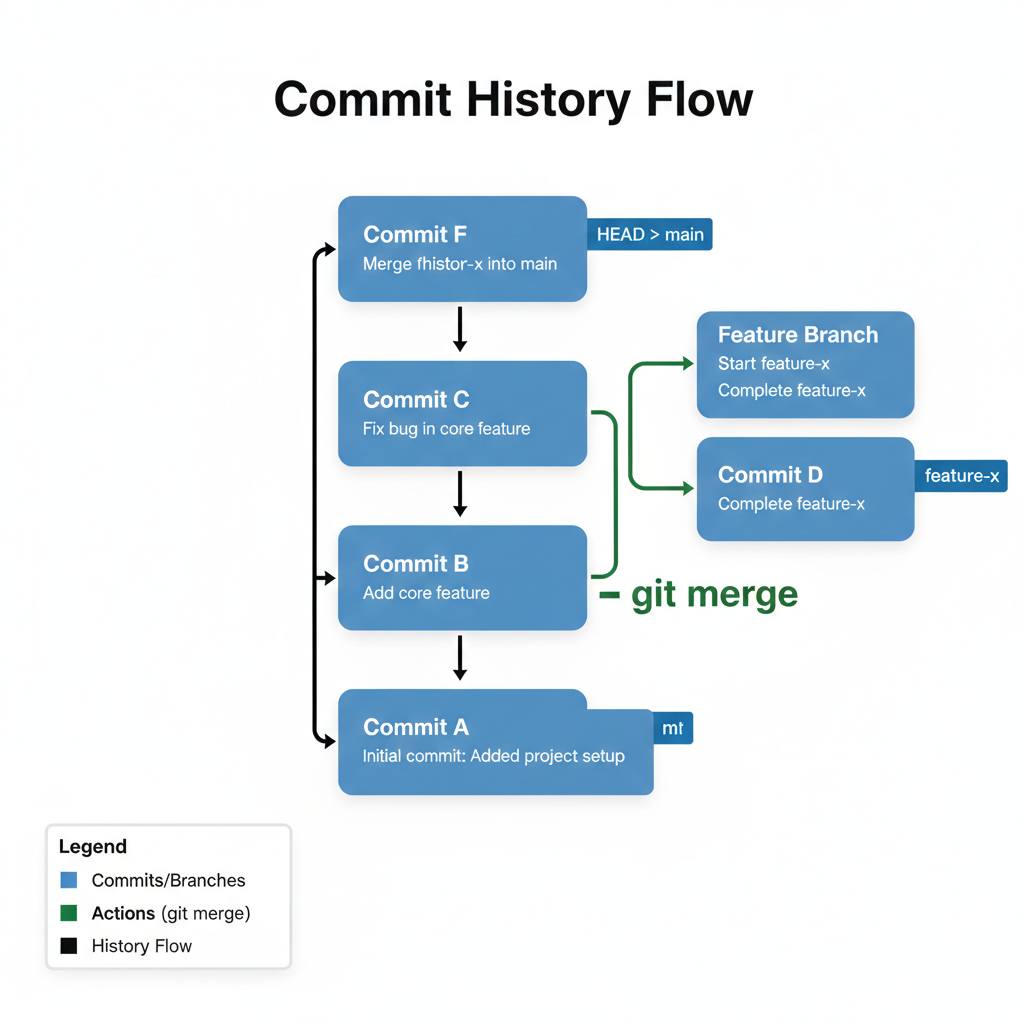
Each commit builds upon the previous one, forming a directed acyclic graph (DAG). This means the history flows forward, but branches can split off and merge back in.
Suggestions for Further Learning
This is just the tip of the iceberg! To truly harness the power of Git, explore these concepts:
Branching and Merging: Learn how to create, switch, and merge branches (
git branch,git checkout,git merge). This is fundamental for collaborative development.Remote Repositories: Understand how to connect your local repository to platforms like GitHub, GitLab, or Bitbucket (
git remote,git push,git pull,git clone).Undoing Changes: Explore commands like
git resetandgit revertfor more advanced ways to undo mistakes.Gitignore: Learn how to tell Git to ignore certain files (like temporary files or compiled code) using a
.gitignorefile.
Git might seem intimidating at first, but with practice, it will become an indispensable tool in your development toolkit. Happy Gitting!